How to Relieve Scoliosis Pain by Fixing Pelvic Side Tilt
Jul 16, 2025
Ever felt like your hips were working against you instead of with you? That slight tilt you catch in the mirror might be more than just a quirk. It can actually crank up scoliosis-related discomfort. I used to brush off little posture quirks like this and think, “Eh, it’s probably no big deal.” Big mistake. It all clicked once I realized how much a tilted pelvis can tug on the spine.
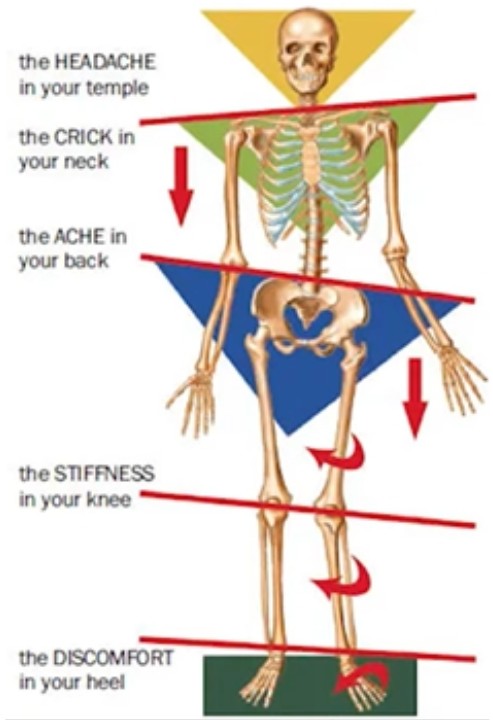
Why Pelvic Alignment Matters
Your pelvis is like the foundation of a building. If one corner starts sinking, the whole structure leans. In scoliosis, that tilt can intensify the sideways curve of your spine. The result? More tension in your lower back and hips, and that nagging, off-center feeling that’s hard to ignore.
Spot the Everyday Imbalances
Nothing heals the body more than the way you move day to day. That’s why the best place to start isn’t an exercise. It’s awareness. Pay attention to your habits. Here’s what to watch for:
- Crossing one leg all the time: Always crossing your right leg over your left (or vice versa)? You’re subtly twisting your lower body over and over.
- Leaning on one hip: Do you wait in line by shifting most of your weight to one leg? Seems harmless, but it builds imbalance over time.
- Slouching on the couch: Nothing wrong with relaxing, unless you’re collapsing one side of your spine every time you do it.
Here’s the fix: mix it up. Switch the leg you cross. Shift your weight to the side you usually avoid. Sit with a little more symmetry. It’ll feel awkward at first, but that’s how you know it’s working.
You can do exercises all day, but if you’re still feeding the imbalance in your everyday habits, you’re stuck on the hamster wheel. Be a detective first. Look in the mirror, literally and figuratively, and start catching the patterns. Then we can talk correction.
Step-by-Step: Pelvic Side Tilt Exercise
Ready to give your hips some love? Try this simple reset to start rebalancing the pelvis:

- Grab a prop: Place a one-inch board or a sturdy book on the ground. You’ll use it to slightly elevate one foot.
- Align and balance: Stand with one foot on the board and the other foot hanging free. Lightly hold a wall or chair for support if needed.
- Lower your heel: Without bending your “floating” knee, slowly lower that elevated heel toward the ground. Feel your pelvis tilt down on that side.
- Keep shoulders level: Avoid hunching or leaning. Imagine balancing a glass of water on each shoulder. Don’t spill.
- Boost the stretch: If you want more intensity, raise the arm on the elevated-foot side overhead. This helps lengthen the side of your body.
- Compare both sides: Now switch sides. Which one feels tighter? Give that side a little more attention.
- Level up: Ditch the prop and practice the movement on flat ground once the motion feels solid. That’s where you build real-world control.
Common Mistakes to Avoid
- Shrugging up: Keep your shoulders relaxed and away from your ears. Tension here cancels out the benefit.
- Bending your supporting knee too much: A slight bend is fine, but don’t turn this into a squat. You’ll miss the pelvis movement we’re after.
- Rushing: Going slow is the key. Control every inch of the motion. That’s how the body learns.
Next Steps
Correcting pelvic side tilt takes time, but the progress adds up. Pair this technique with muscle balancing and posture awareness during your day. If you want a guided, step-by-step approach to real change, try our free 7-day trial. That’s where we go deeper into building a strong, stable foundation for your whole body.